Forms — DRAFT
The Forms components allow authors to build rich forms that a user can submit.
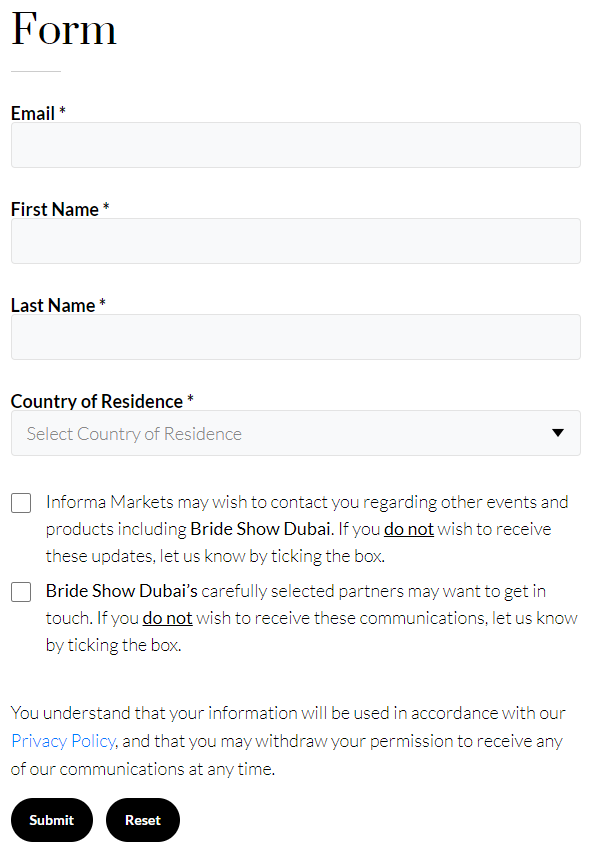
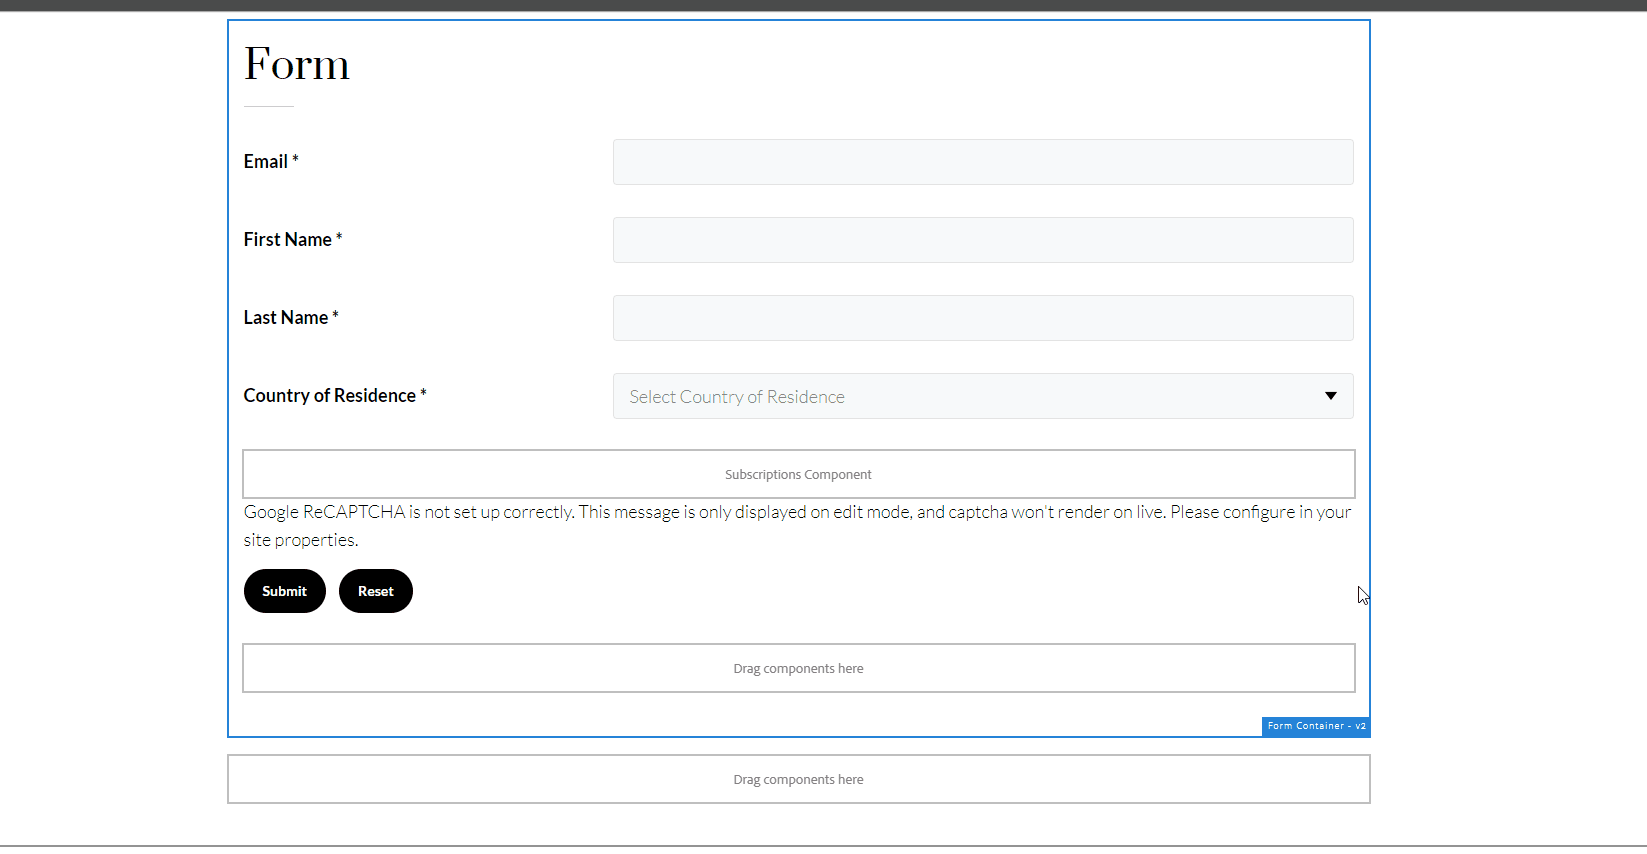
Example
Authoring

General Tab
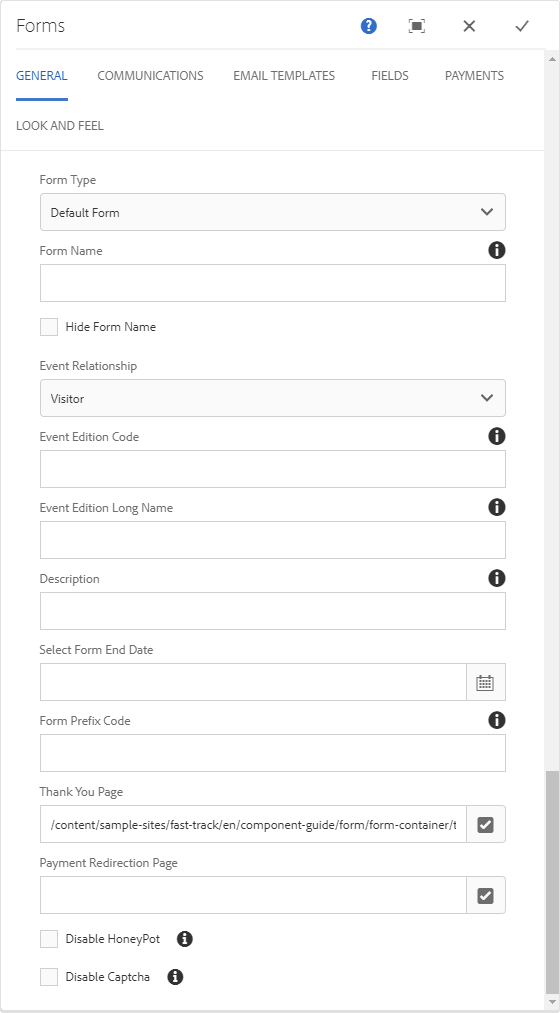
Form Type
The form types allow you to select the type of form to setup.
Form Name
This allows you to update the form name. When left blank, the default value for this field is “Form”.
Hide Form Name
When ticked, this allows you to hide the form name.
Event Relationship
This gives you the option to categorize the registrants.
Event Edition Code
Use this field if you want to use a different event edition code from the one configured on the website. An event edition code is a unique code specifically provided for each event. For example, AET19DTF.
Event Edition Long Name
Provide the complete name of the event. For example, Gulf Traffic 2019.
Description
This is where you describe the form.
Select Form End Date
Use this to set an expiry date for the form. When the form expires, it is no longer available (hidden) in the page from the website’s visitors.
Before Expiry 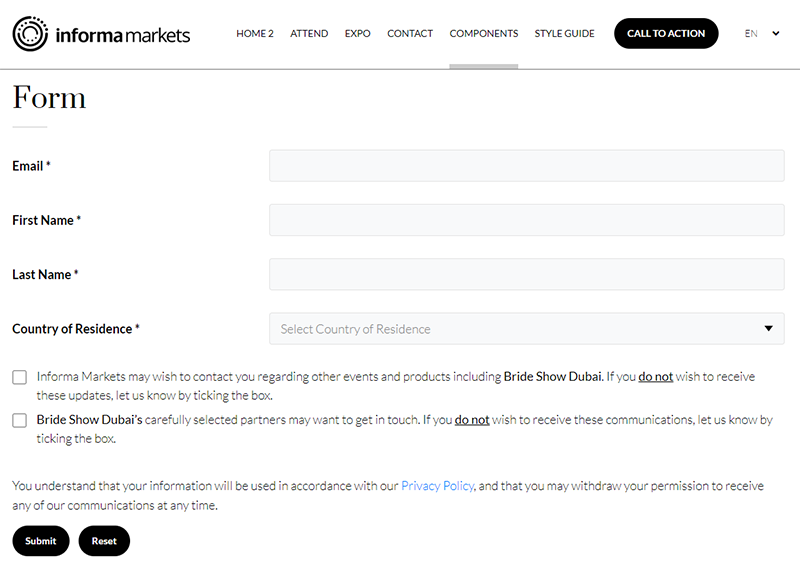
After Expiry 
Form Prefix Code
You can use this field to add a unique prefix to identify the data from form submissions.
Thank You Page
Use this to select the Thank You page.
Payment Redirection Page
Use this to select the Payment page path.
Disable Honeypot
When ticked, this will disable the HoneyPot spam prevention.
HoneyPot
Honeypot is enabled by default as an anti-spam measure on AEM v2 forms. Groups can optionally still add Form CAPTCHA if they require 2 types of protection.
To add captcha on your form, you need to first add Recaptcha Public Key and Private Key on the site. Please work with your Application Support Team to create this for the website.
Disable Captcha
When ticked, this will disable the Google Captcha.
Note
Interface for ‘Disable HoneyPot’ and ‘Disable Captcha’ to be reconsidered as we cannot disable both at the same time and ‘Disable Captcha’ check-box is redundant when there is no reCaptcha component placed on the form.
Communications Tab
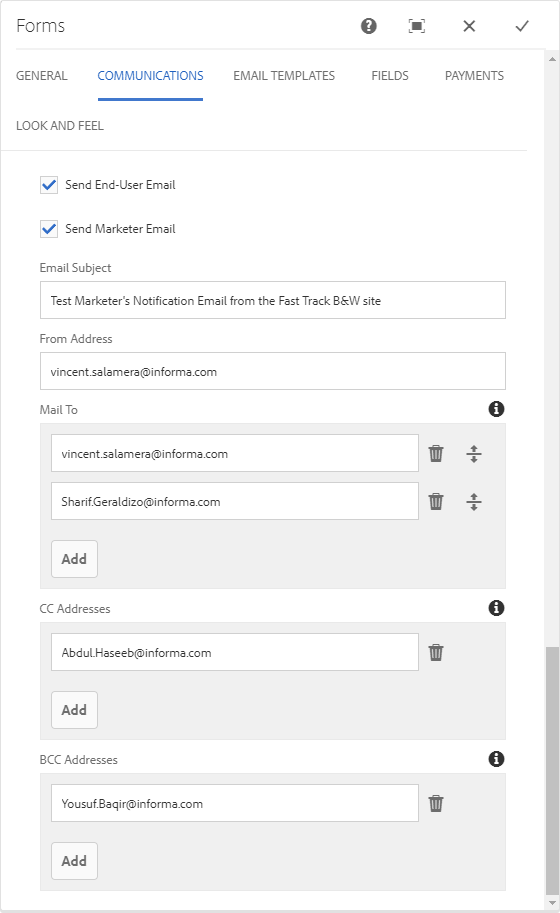
Send End-User Email
When ticked, this will send an email confirmation to the registrant on form submission.
Send Marketer Email
When ticked, this will send the marketer’s notification email to the email address provided in the Mail To field.
Email Subject
Add email’s subject here.
From Address
You can specify the sender that will appear in the confirmation email.
Mail To
You can list here the recipients (marketer’s email addresses) of the information after submission.
CC Addresses
You can specify in this field the recipients (marketer’s email addresses) for CC.
BCC Addresses
You can specify in this field the recipients (marketer’s email addresses) for BCC.
Email Templates Tab
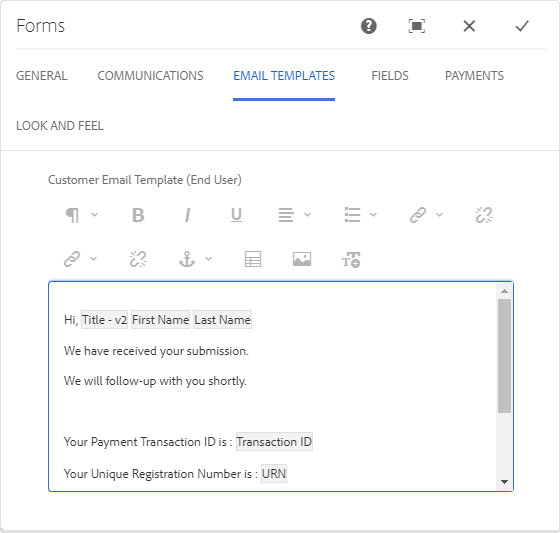
Inserting Placeholders
Note
The form component must be in the form for its corresponding placeholder to be available.
- Click the ‘Placeholders’ icon as shown in Illustration 1.
- Select and click the placeholder as shown in Illustration 2.
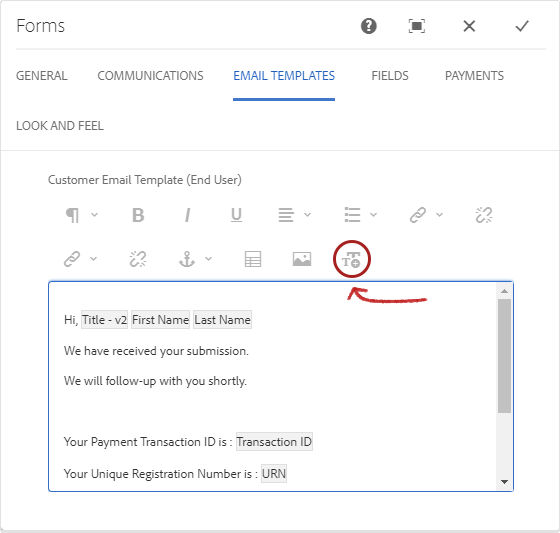
Illustration 1

Illustration 2
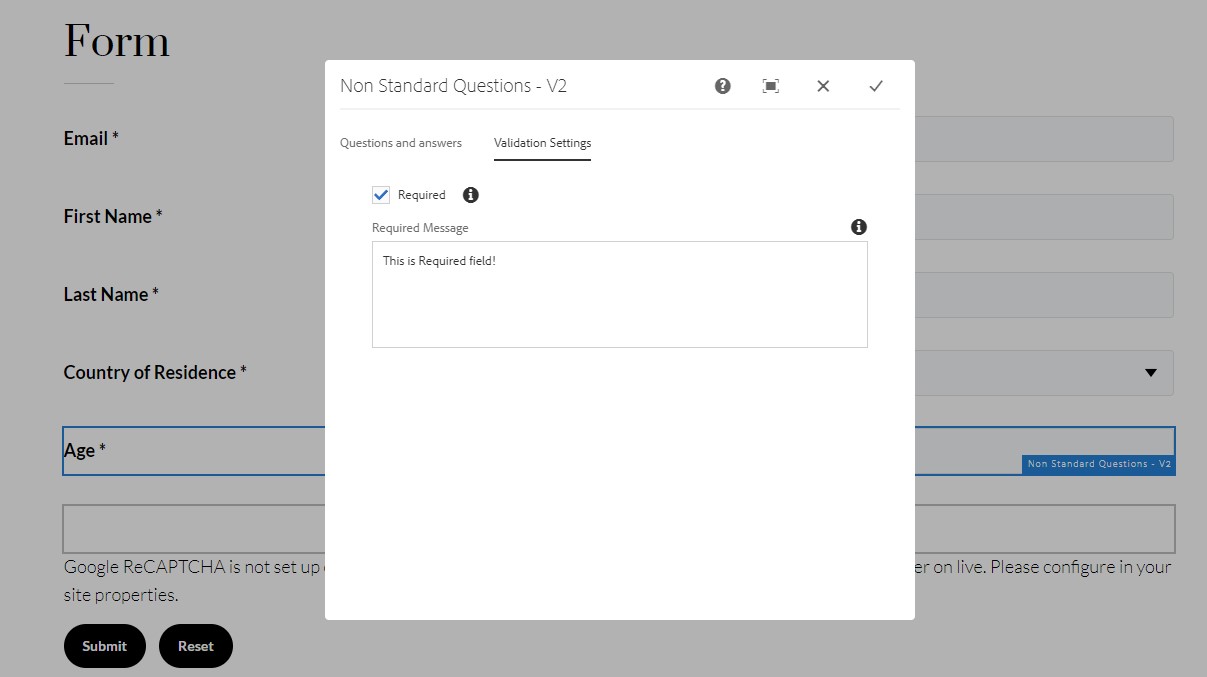
Fields Tab
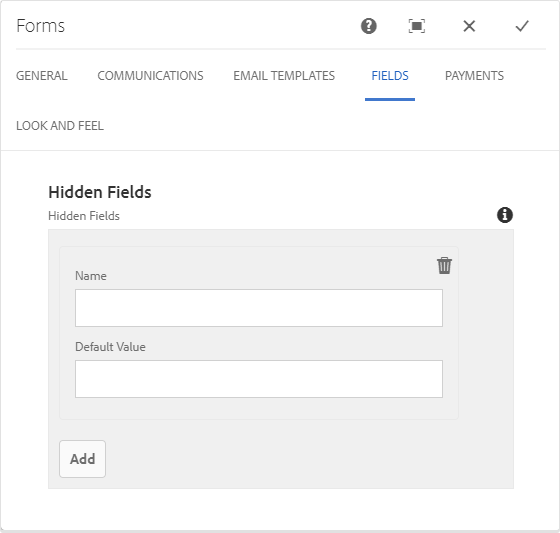
You can add additional hidden fields with specific values to the form.
Hidden Fields
Name
The name of the hidden field you want to add.
Default Value
You can specify a value for the hidden field.
Payments Tab
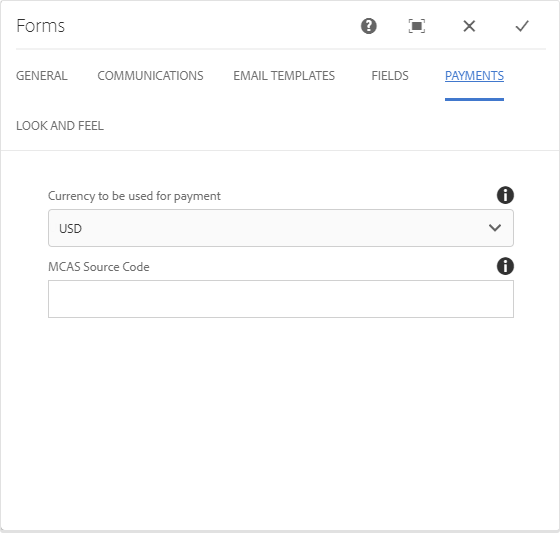
Currency to be used for payment
On this field you can select the currency to be used for the payment.
MCAS Source Code
You can provide on this field the code to send to MCAS service to retrieve appropriate cybersource credentials.
Note
Payment form is yet to be tested on Stage and Prod
Look and Feel Tab
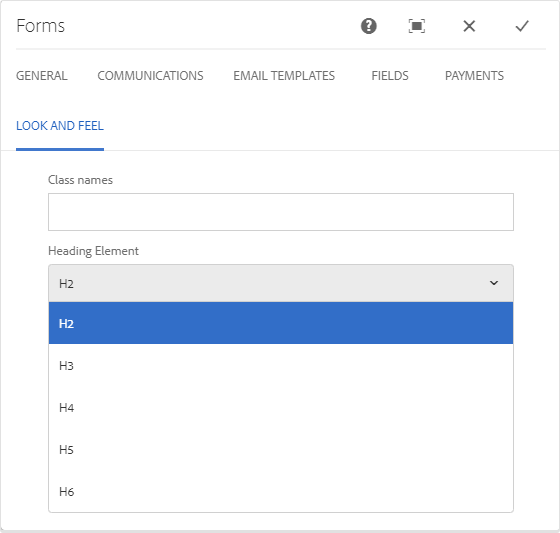
This tab enables you to customize the heading tag (H2 to H6) of the form title.
Heading Element
You can select from the dropdown the header size you want to use for the form title.
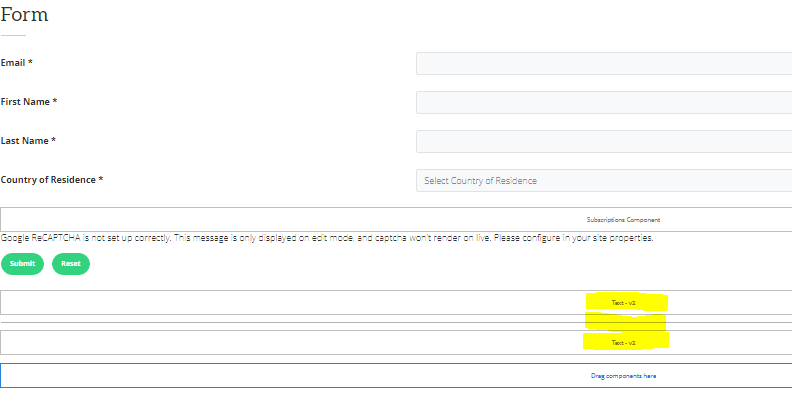
Multiple Text and Separator components -
multiple text and separator components can now be added within the form container.
In the country of residence component, you can now select specific countries to be removed from the list by going to it's configuration as shown in the GIF below.
Please note that if you select a country in the Top Countries option, these countries will still be listed under the Values to tab and can still be disabled but you wouldn't disable a country you've added to the top countries or add a country you've disabled.

Copyright © 2025. All rights reserved. Informa Markets, a trading division of Informa PLC.